A couple of months ago I took some videos with a GoPro during we moved all of our stuff into our new apartment. I thought it would look especially cool to have a time lapse video of me filling my bookshelf. Before I could share the video, I wanted to edit it a little bit. With GoPro videos usually you have some seconds at the beginning or end where you’ve moved the camera or some time in between where nothing happens. Due to the wide angle I also often have a lot of things on the video I don’t really need. So I wanted to cut the video and crop the image. Since I haven’t done anything like that before, I was looking for a video editor. I found a comparison of free video editors (in German) on an Austrian tech blog I follow. I chose to use DaVinci Resolve.
Contents
DaVinci Resolve: first steps
Go to blackmagicdesign.com and click “Download”. Download the version you want (I use the free version DaVinci Resolve 12.5.5). Install the program.
Clips & Timelines
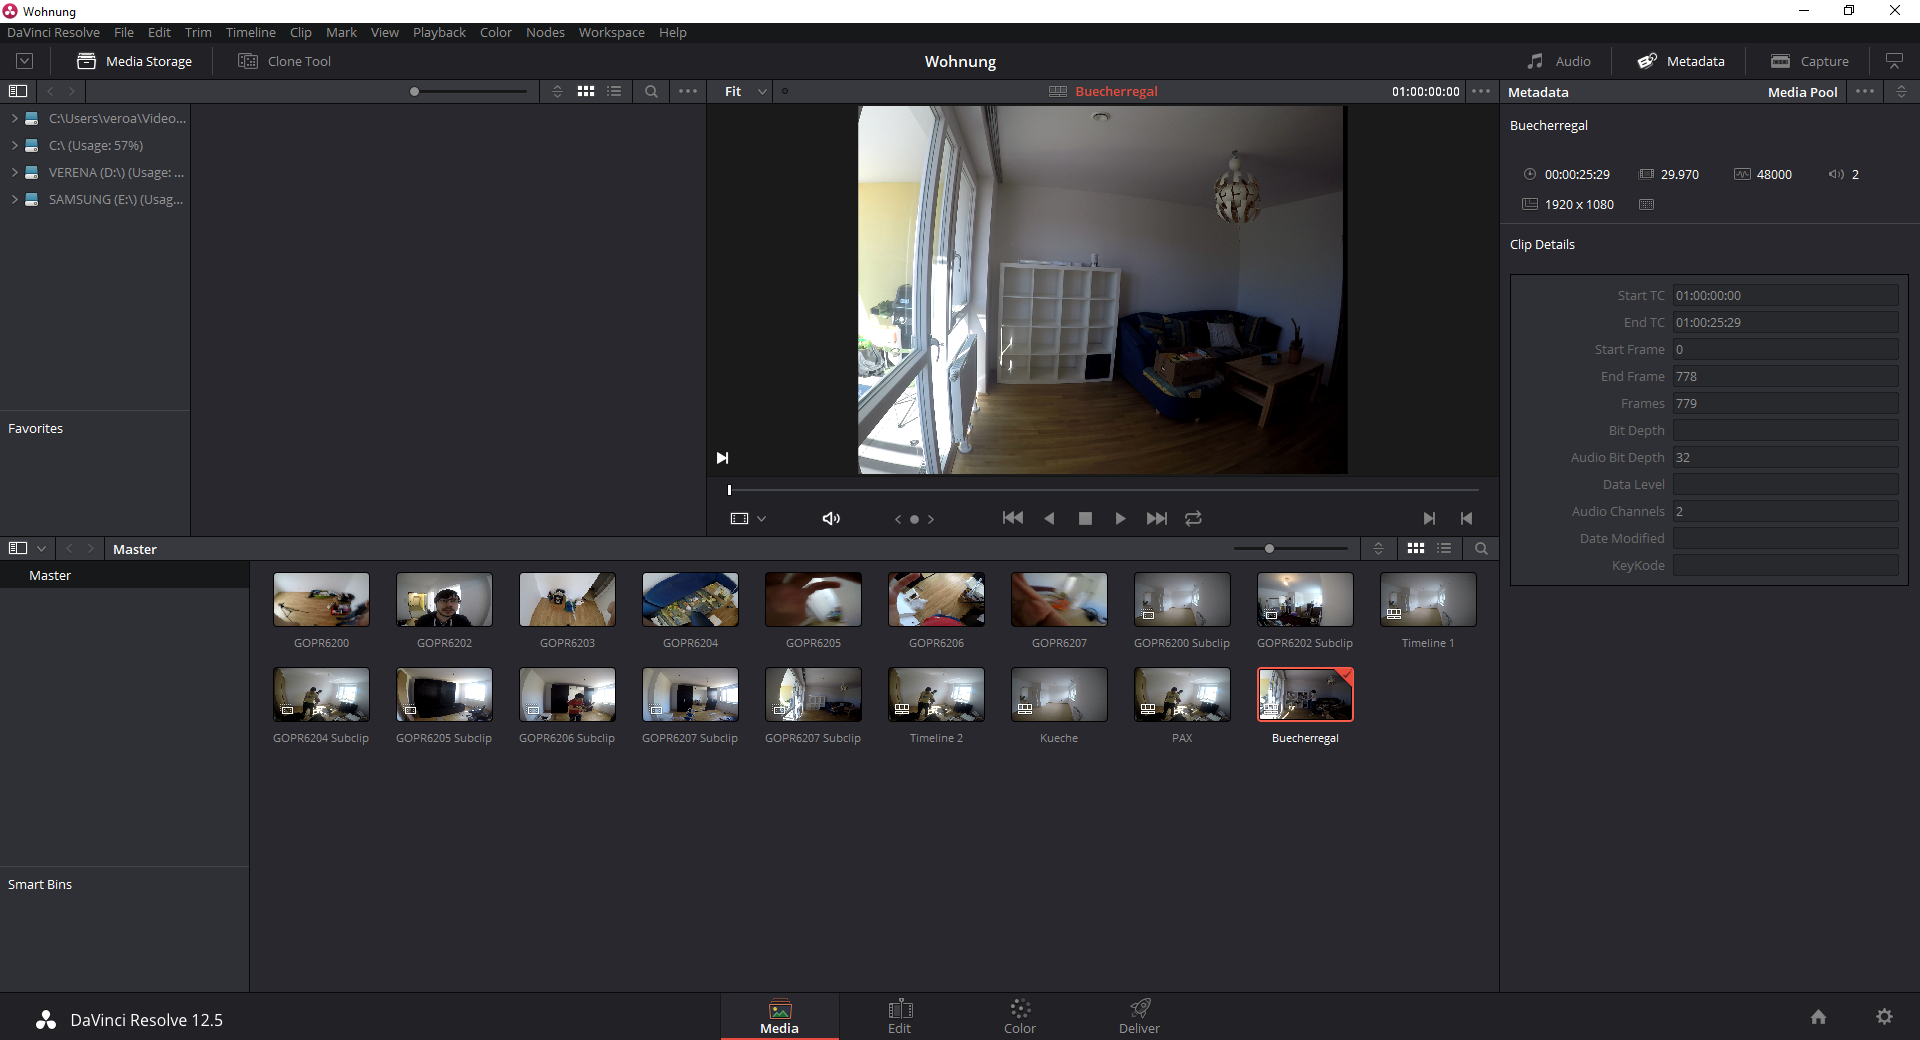
When you first open the program, create a project and add some videos, you will see an overview of all the clips in the project. In my screenshot you also already see timelines because I took the screenshot after I finished the first video. In this view I created sub clips by trimming the start and end of the videos that I wanted to concatenate.
To create a subclip, do the following:
- Rightclick at the positions where your sub clip should start/end.
- With Mark In / Mark Out you mark start and end.
- Rightclick > Create SubClip
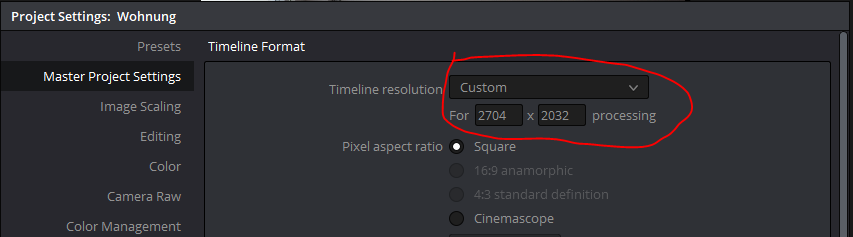
You can also trim videos later when you have created a timeline. Timelines are where the actual editing happens. It might be that the dimensions of your video doesn’t fit the project settings (it should ask you at the beginning to fix that). The program either didn’t ask me or I ignored it, so I had to change it manually (to get to the project settings click the gearwheel in the right lower corner). Otherwise your video will have black bars when the video is too high or too wide.
By selecting clips and right clicking them, you can create a “New Timeline Using Selected Clips…”. You can always add more clips to the timeline later.
You can see several timelines in my workspace: “Timeline 1”, “Timeline 2” (those were for testing), “Kueche” (“kitchen”), “PAX” (the name of our wardrobe) and “Buecherregal” (“bookshelf”). In this post I’ll focus on what I did with the video containing my bookshelf.
When you double click on a timeline, you get a different view. Tip: You can always switch back by clicking Workspace > Primary Workspace > Media.
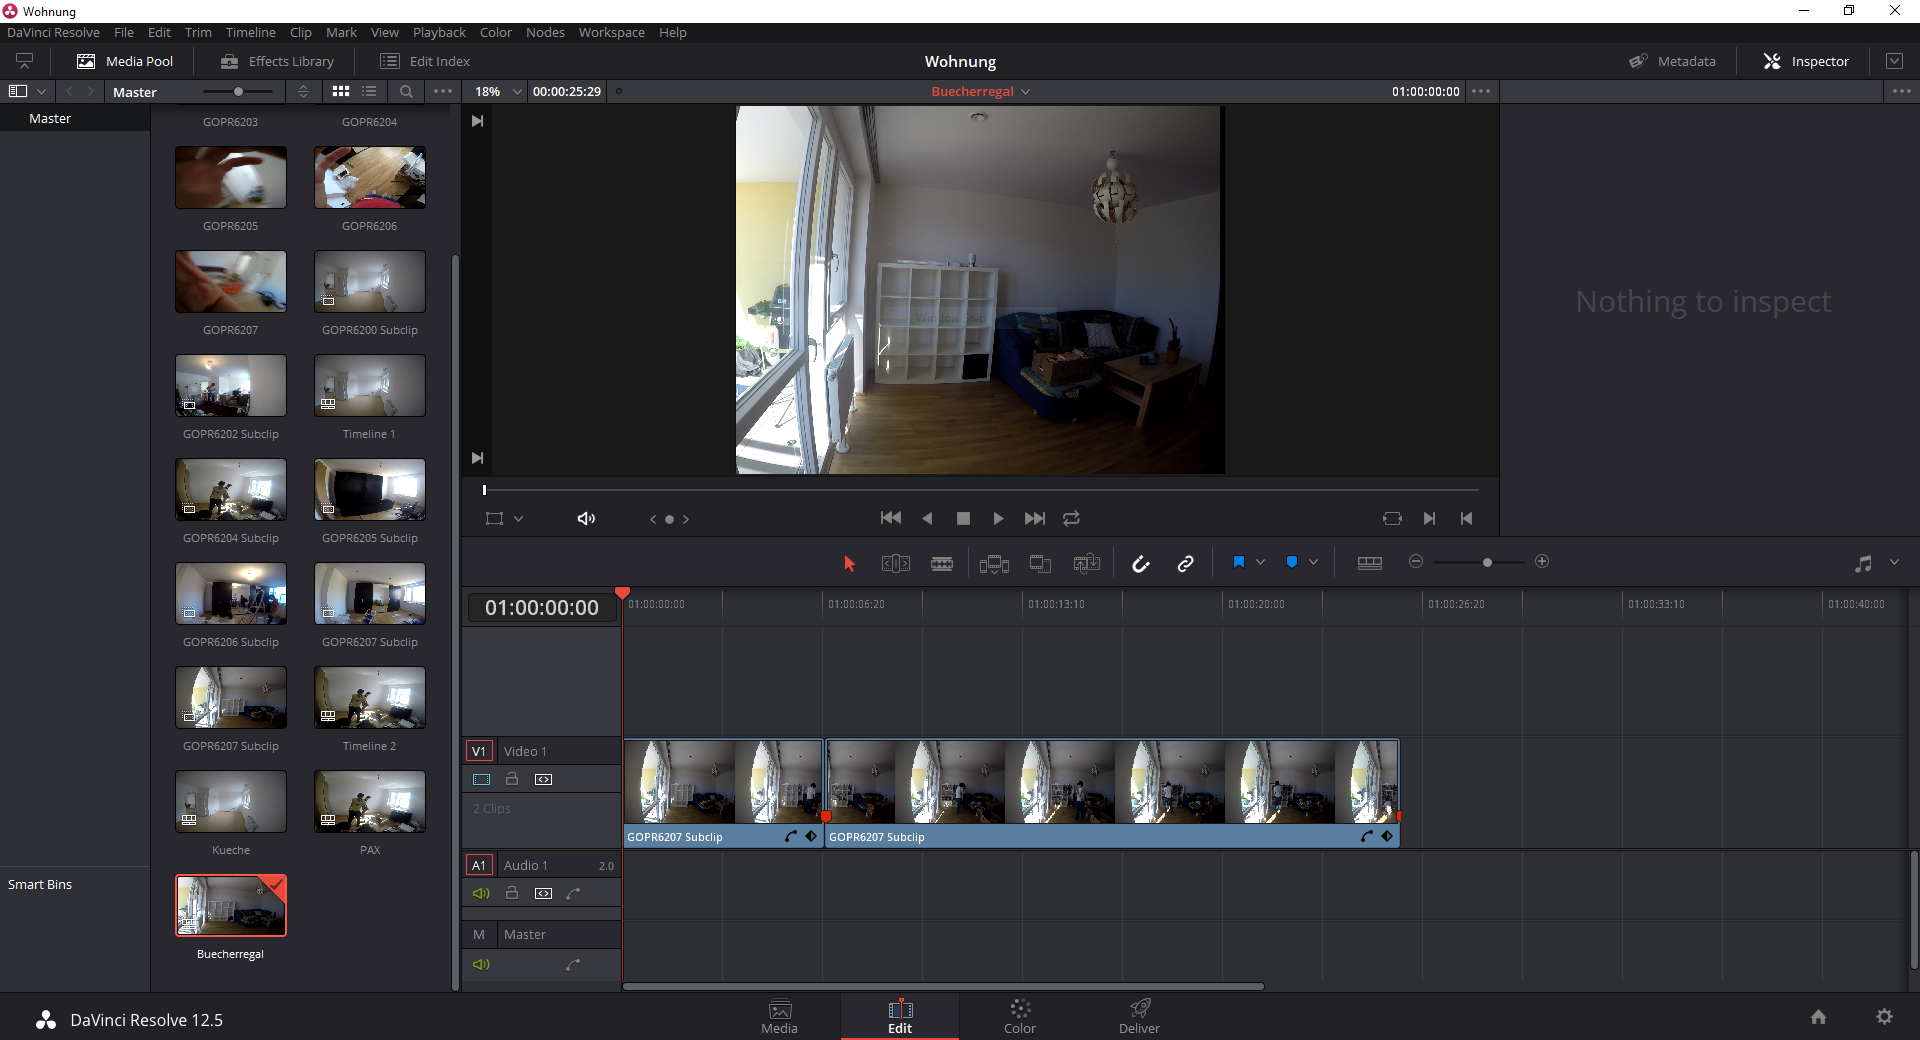
There are several tools available in this view.
As I mentioned before, I wanted to crop the video (there was a lot of wall and ceiling on it) and I wanted to remove parts at the beginning, end and in the middle where nothing happened.
To achieve this I have used the Trim Edit, Razor Edit, Flags and Markers.
Helpful: markers & flags
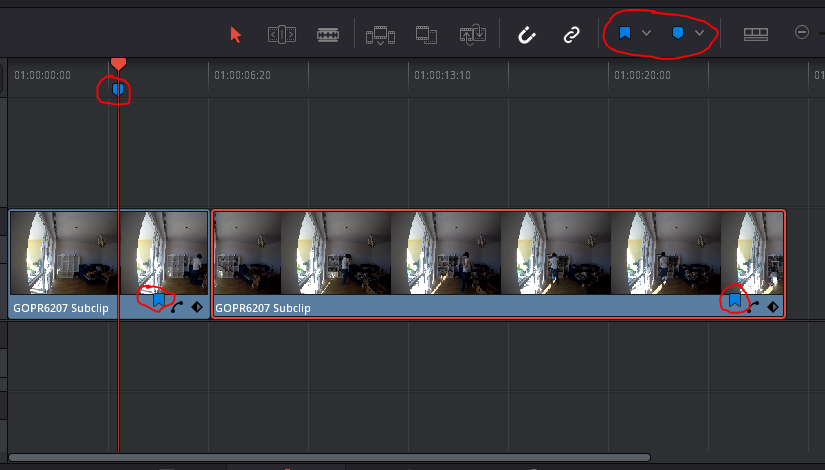
When starting to cut the video (either trim the start or the end or cut parts in the middle), I found markers very helpful. You can either click the mark symbol (the right one) or press “M” any time in the video (when it’s running or when you move through the frames with the left and right key) and a mark symbol will appear (below the red line in the image). The mark is helpful because when using the cutting operations (trim or razor), your mouse will snap to the marker and the cut will be exactly where you wanted it. I noticed that the marker appears at different positions depending on whether the clip is selected (surrounded by a red border like in the screenshot). When the clip is selected, the marker will appear directly on the clip, otherwise the mark appears above in the timeline. I’m not exactly sure what all differences are but I noticed that snapping only seems to work when the marker is on the clip itself.
If you want to flag a whole clip, you can use flag (the left symbol). Then a flag will appear (you can see tags in both clips).

2 steps to improve your GoPro video
“Crop”: Zoom & Position
To get editing tools, click the “Inspector” in the upper right corner. Then select the clip(s) you want to edit. At first I tried to do it with the options below “cropping” but this is actually not the right tool for the task. What happens when you crop a video is that you get a black bar instead of the cropped region.
To “crop” the video as I wanted it, I followed these two steps:
- Zoom: This makes the video larger by the factor that you enter in the box
- Position: By using positive and negative X and Y values you can move the video around to contain the part you want
Cut: Trim Edit & Razor Edit
These two functions can be found in the tool bar I have shown above. To mark the positions where to cut I used the markers described above. The Trim Edit completely removes the start or end of the video. The Razor Edit cuts the clip exactly where you want it which results in two separate clips. If you make two razor cuts you can e.g. move or delete the clip in the middle. This helped me to remove boring parts at the end in the middle of the video.
Before & After
You probably don’t need to watch the videos to understand what I did – but here they are anyway.
I have been wanting to get better at editing in Davinci Resolve, so this guide was really helpful for getting started. I like that you mention how you can make a subclip just by right-clicking on the clip once you set in and out points. This will definitely come in handy when I am making my selects for my next project. Thanks for sharing!